Creating A Filter
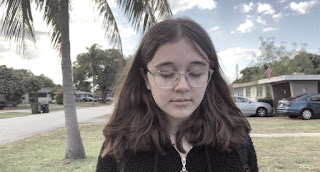
The next step in our editing process was finding a filter. Once again, I search through iMovie for a filter that would fit the opening sequence. I wanted a filter that would make the clips look dull and mysterious. Since our genre is Thriller I looked back on our research and noticed many greys and dark blues in many intense or mystery filled scenes. Fortunately for me, I found a filter on iMovie entitled 'Camo' which made the scenes dull and full of dark blues and greys. I applied the filter to one of the clips to test it out and show it to my group mates. My group mates liked the idea of a filter that drained most of the bright colors from the scene. However, they also suggested that applying the same filter to the entire sequence could bore the audience. One of my group mates then suggested applying contrasting filters on the scenes. She explained that all the clips contain the mother, who is the main villain of the story, could use the 'Camo' filter. The scenes that had Emily in them, or did not have the mother at all would be bright and colorful. For the bright and colorful scenes we could not find a suitable filter. I recalled that for my music video, to have a colorful effect I simply raised the saturation. My groupmate, who was editing raised the levels of saturation all the way up to clearly contrast the dull scenes.
This way not only is the dialogue and acting telling the story but the coloring of the scenes as well. We wanted to show the audience how the main character, Jane, feels in different environments. She is upset and conflicted when she's with her mother. This is why we chose the dull, draining filter to reflect those feelings. Without her mother, she becomes more calm and opens up easier. Which is why we chose brighter colors and higher saturation.


Comments
Post a Comment